Crafting a lethal border for your garden's wildlife: a step-by-step guide for a bloody nature sanctuary
Creating a lively "dead" hedge is all about reusing nature's leftovers to build a vibrant ecosystem in your backyard. If you've got a surplus of branches, twigs, and prunings lying around, let's repurpose them into a charming, eco-friendly barrier that wildlife can't resist. Here's a no-nonsense guide on how to craft your own dead hedge.
What's a Dead Hedge?
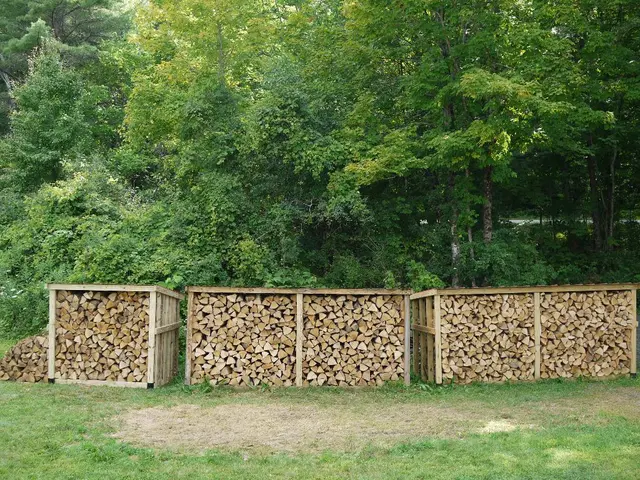
When talk turns to dead hedging, don't get it mixed up with hedge laying. The latter is where you bend over living hedge plants, weaving them to form a dense, green barrier. Unlike its living counterpart, a dead hedge repurposes woody scraps from your garden pruning to create a screen, fence, or partition.
Horticultural Advisor, Nick Turrell explains, "Imagine a homemade wooden fence. A dead hedge can be as tall or short as needed, so it fits perfectly in even the tiniest gardens. Plus, it doesn't have to be straight; it can take on winding, curvilinear shapes."
Besides conserving resources, dead hedging prevents carbon emissions by preventing pruning trimmings from being burned or sent to the council recycling center. This eco-friendly approach is a win-win for Mother Nature and your wallet.
Materials & Toolkit
To bring your dead hedge to life, you'll need:
- Long, thick branches for the skeleton
- Smaller twigs and branches for filling in the gaps
- Pruning loppers or a saw to trim branches if necessary
How to Build a Dead Hedge
Unlike the daunting task it sounds, dead hedges are a breeze to make. Choose a single or double row of supports during construction. A single row offers a lighter, more informal structure and requires less time to set up. However, a double row of supports might take a bit more effort initially, but it's a cinch to stack deadwood afterward.
Step 1: Choose Your Location
Decide where you'd like to create your dead hedge, how big or small you'd like it, and whether you'd like a single or double row of supports. Consider factors such as wind direction if you want it as a windbreak or if you aim to screen off an unattractive area of your garden.
Step 2: Gather Your Materials
Hunt down fallen branches, twigs, and woody debris in your garden or land. If necessary, prune branches from trees or shrubs. Mix up sizes for texture and filling gaps.
Step 3: Insert the Supports
Bury the supports approximately one-third of their total length into the ground. Any material can be used as a support post—chunky lengths of timber, bamboo stakes, or even heavy-duty twigs. Position the supports about 1 to 1.5 meters apart in a single or double row.
For easier weaving with a single row, stagger the supports approximately 10-15 centimeters apart. With a double row, space the parallel rows approximately 45 to 60 centimeters apart.
Step 4: Construct the Skeleton
Stack larger branches at the base for stability and weave smaller twigs and brambles over them to create density. With a single row, weave branches through three or four supports to give the hedge strength. Fill in gaps with finer materials.
With a double row, simply stack woody debris between the rows, either all at once or gradually as you acquire more materials throughout the year. Strive to create a dense, compact structure.
Step 5: Fine-Tuning
As the structure settles, fill in gaps with smaller twigs and branches to ensure the dead hedge remains thick and effective for its intended purpose.
Step 6: Maintenance
Periodically, you'll need to reinforce the structure and fill any new gaps that appear as the dead hedge decomposes over time.
If you'd like to add a little extra charm to your dead hedge, consider these ideas:
- Add Hedgehog Homes: Plant a few old roof tiles at the base of your hedge to offer shelter for hedgehogs and other small mammals.
- Durability: Construct the dead hedge piece by piece over time, building it up as you prune and tidy your garden.
- Add Some Colour: The RSPB suggests hanging climbing plants, such as honeysuckle or Clematis Rehderiana, over the hedge, or sowing a mini meadow nearby.
If you're looking for alternative garden screening ideas or fast-growing hedges, explore other landscaping options to complement your unique dead hedge. Happy building!
- A dead hedge, unlike its living counterpart, reuses woody scraps from garden pruning to create a screen, fence, or partition, similar to a homemade wooden fence.
- Building a dead hedge can be as tall or short as needed, making it fit perfectly in even the tiniest gardens, and it can take on winding, curvilinear shapes.
- By creating a dead hedge, you're not only conserving resources but also preventing carbon emissions by preventing pruning trimmings from being burned or sent to the council recycling center, contributing to sustainable living.
- To build a dead hedge, you'll need long, thick branches for the skeleton, smaller twigs and branches for filling in the gaps, and pruning loppers or a saw to trim branches if necessary.
- To add charm to your dead hedge, consider adding hedgehog homes by planting a few old roof tiles at the base, constructing it piece by piece over time for durability, or adding some color with climbing plants like honeysuckle or Clematis Rehderiana.


